Shadow Shard
Overview
The Shadow Shard is an alternate dimension permanently linked to by Portal Corporation. It is called the Shadow Shard because among its inhabitants are many that appear as shadows of familiar enemies from the main dimension (where Paragon City and the Rogue Isles are located).
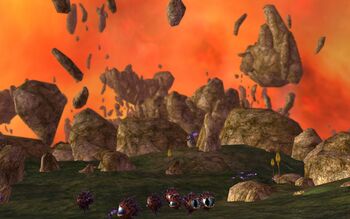
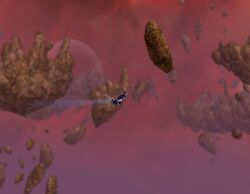
The Shard is a world of islands and rocks floating in a strange-colored sky. Humans from the main dimension have begun to explore the zone, and have set up bases of varying sizes across the shard.
The Shard is made up of four different zones, beginning with Firebase Zulu, and progressing through Cascade Archipelago, The Chantry, and The Storm Palace. All are hazard or trial zones. There is a hospital that is located in Firebase Zulu, in addition to a Reconnaissance Officer, who gives information on the whole Shadow Shard.
Enemies across the Shard include natives like the Shadow Shard Reflections, Soldiers of Rularuu, Storm Elementals, and visitors from the human dimension such as the Circle of Thorns, Crey and Nemesis.
Four Task Forces are organized out of the Shard, and missions may be run from several contacts in the zone who will give unlimited missions to high level heroes.
While villains cannot visit the Shadow Shard itself, several higher level contacts (such as Technician Naylor) offer instanced trips into the Shard.
Zones
The Shadow Shard is a parallel universe with four zones.
Mapping
As the Shadow Shard maps are all considered Trial zones, the player mini map is initially set to black. This can make navigation quite challenging without the Reveal power.
Shadow Shard maps are crisscrossed with faint green lines that show origins and destinations of gravity geysers, but their locations are not always clear from the map. Also, many jumps are vertical and thus do not show up on the 2D map. However, the ready availability of flight powers (eg from the P2W Vendor) renders the gravity geysers largely redundant.
Effects within the Shadow Shard
One interesting effect present everywhere within the Shadow Shard is that gravity is "different", meaning that a fall of any distance will not damage the character in any way.
If a character falls off an island, they will fall to the bottom of the zone and then be teleported back to a safe place on the first island in the zone (the one with the teleport gateway back to Zulu or, in Zulu, Firebase Zulu itself). This can be frustrating to players who are attempting to get to a destination via gravity geyser and miss. However, it can be advantageous as well, offering a convenient route back to Firebase Zulu, or a handy way to escape enemy encounters that are going poorly.
Non-flying enemies that fall over the side of an island are never seen again. They are not defeated so do not provide xp or badge credit; they just vanish.
Getting around
The Shadow Shard houses the largest zones in the game — some can take minutes of continuous use of travel powers to cross.
Fly
As the zones are composed of floating islands, truly in three dimensions, flight powers are greatly appreciated. There is a P2W Vendor in each Shadow Shard zone from whom jetpacks can be bought. Group Fly can be of some use here to let teammates fly faster than P2W jetpacks. Note that geysers represent very high speed travel, and even flying players may find them worth using if their direction is convenient.
Teleport
Teleport powers are also very useful, not only for fast three-dimensional movement, but also for Teleport Target. The maximum range of Teleport Target can easily be exceeded, requiring the teleportee to try to keep up or to be teleported to a midpoint in the journey. Slotting a Range SO or IO into the inherent slot can mitigate this to some degree.
The Mission Transporter and Team Transporter powers are very useful for door missions, but of no benefit for open-world missions. Assemble the Team is also valuable.
Jumping
Jumping powers are useful for minor sorties into the Shadow Shard; however, most islands are deliberately placed to be further than the maximum distance. Jumpers are likely to need jetpacks (or the geysers) for most of their travel.
Super Speed
Those with Super Speed are most likely to be left behind. Not only is movement difficult, the native Soldiers of Rularuu have a large number of +Perception foes, reducing the effectiveness of the +Stealth component of Super Speed.
Getting around via gravity geyser
The first person you'll see in Firebase Zulu is General Hammond and the first mission he will give you is a tutorial on how to use the Gravity geysers. Gravity geyser travel is a pretty different animal so pay attention! The ready availability of P2W jetpacks means it's not really necessary for any character to master these, but they can speed up your journey (and if you have such a jetpack, if you fumble and miss the geyser's endpoint, you can easily remedy matters.)
Unfortunately, what the general tells you is not entirely true, which has caused a lot of player confusion.
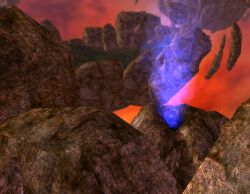
Stepping on a geyser is much like stepping on a cannon. Each geyser has a 'slot' in the rock that leads up to the geyser itself. To use the geyser, slowly move up that slot and be sure you go straight up the center. These things shoot you a long way so being even a little off is bad. Once you are in the air, your controls are limited. If you try to go backwards then you will immediately stop moving forward. If you try to go left or right then you will lose most of your forward momentum fall unless you also have the forward key pressed down. However, if you do keep that forward key down (probably the 'W' key), you can steer yourself a lot by pushing the left and right keys. Just make sure you keep that forward key down! Holding down the forward key will cause you to go faster forward but will not break anything.
Despite what General Hammond says, people with superjump and superspeed should keep their travel power activated. Doing so increases your ability to steer. Given how often geysers will drop you right into a hostile Rularuu spawn and how easy it is to be a few degrees off as you go up the geyser, the ability to steer is very important. Turning on a flight power will stop you dead so you don't want that on when geyser jumping, but turning it on after you miss a jump can save you a lot of frustration early on.
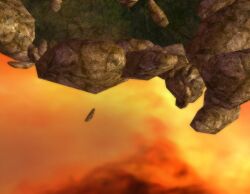
Vertical geysers can be particularly difficult. There's a geyser just south of Point Charlie in Firebase Zulu that can be greatly frustrating to new Shadow Shard players. Done correctly, the geyser will shoot you almost straight up and you will land on an outcrop of rock sticking out of the island above. If you come at the geyser wrong, though, you will fall to either side of the outcrop. Also, if you hold down your forward key just a little too long, you'll go too far forward and bump your head on the bottom of the outcrop of rock. Having a travel power on magnifies this effect. However, even if you mess up a bit on the geyser, you can still easily correct the jump by steering. All you have to do is watch where you are going! In fact, with superjump or superspeed, you can steer yourself right to the next geyser's slot and save yourself some time!
It's not too hard to tell where a geyser is going most of the time. Simply look down the rock slot and you'll see where you are going. The only exception to this is vertical geysers.
All that said, you will need practice to learn how to do this. If you have never used geysers before, don't try to learn them when people are waiting on you. Go in solo and set aside some time just to learn the system. Enemies in the Shard are very rough for a single player so you might want to wait until you have a few levels past 40 and/or some good stealth to help keep the wildlife off you while you practice your cannonball runs. Once you get the system figured out and some practice under your belt, though, you'll rarely fall and will be able to get around the giant zones fairly quickly.
Note that there are two geysers (one in the Chantry and one in the Storm Palace) that shoot you straight up. If you don't steer, you will land right back at the geyser you jumped from! You'll have to figure out yourself which way you want to go and go there. Both of them shoot you very high so you'll have plenty of time to steer, assuming you have superjump or superspeed on.


