The Players' Guide to the Cities/Creating a Character
Checking Name Availability
Before you create a new character, you may already have a name you'd like to use in mind. If so, it is a good idea to make certain that name is available on the server you have selected. This can be done with the "Enter Name Here" field at the bottom of the character creation screen. Use of this feature is detailed here:
Choosing Alignment
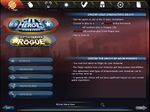
The choice of alignment is an important decision for your character.
You can choose to start on Primal Earth (home to Heroes and Villains), or Praetoria (home to Praetorians). For your first character, it is probably best to start on Primal Earth. If you do, you'll choose Hero or Villain during character creation or the tutorial.
Will you confront super villains, aliens, madmen, criminals, and other fearsome foes in Paragon City? Will you take on the responsibility of protecting the sprawling metropolis and its citizens from the clutches of evil?
Will you choose to take part in the fight for survival of the fittest on the Rogue Isles? Will you commit heists, kidnappings, and infiltrations on your way to fulfill your destiny as a legendary arch-criminal?
Or will you take part in the civil war on Praetoria, fighting for or against Emperor Cole's tyrannical regime? The choice is yours.
Selecting an Origin
Your origin is the source of your powers. Were you born with them, or did you study for long months and years to perfect them? Or perhaps you acquired them after some encounter with mysterious forces?
Origin is an essentially cosmetic decision; it does not impact your character's power levels or abilities. It just adds a bit of flavor to your character, since it determines what grants you your powers with which to either save or wreak havoc on the world.
In addition, each origin grants a different inherent attack available at level 1, although these can be changed by the P2W Vendor. Each of these powers is ranged and does minor damage of some form. Most of these powers also have a weak, short-duration secondary effect.
The origin you select for your character will also determine which additional titles are available for your character at level 25.
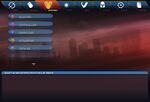
There are five origins available for selection:
 Magic
Magic- You receive your powers from a magical source. These abilities might come from a mystical artifact bestowed upon you, the mastery of numerous magical spells, or pacts made with powerful dimensional entities. This origin will give you access to Apprentice Charm. This item has a very short range and deals minor energy damage, as well as lowering their resistance to further damage.
 Mutation
- You were born with abilities which set you apart from the rest of humankind. Your powers manifested at birth, puberty, or possibly adulthood. Mutants are often viewed with awe and fear by those who don't understand them. This origin will give you access to Mutagen. This item has a very short range and deals minor energy damage, as well as lowering the damage the affected target deals out.
 Natural
- You aren't 'super' at all; your amazing talents come from intense training and innate abilities. You might have been driven to physical excellence by some all-encompassing desire for perfection or revenge, or perhaps you are not human at all, and possess powers natural to your race. With your natural origin you have to rely on your cunning and skill. This origin will give you access to Throwing Knives. This attack has a very short range and deals minor lethal damage, as well as inflicting additional damage over time.
 Science
- You received your powers either through purposeful scientific inquiry or some accident gone awry. You have since learned to harness your new-found abilities, becoming a powerful force in the world. This origin will give you access to Tranq Dart. This item has a very short range and deals minor lethal and toxic damage. In addition there is a small chance you can put the target to sleep with the dart, but they will wake up the next time they are damaged or healed.
 Technology
- You derive your powers from technological devices, from suits of high-tech body armor to powerful energy weapons. Few have been able to duplicate the amazing technology which lies behind your gadgets. You need not be a brilliant inventor; you may have acquired these items from another source. This origin will give you access to Taser Dart. This attack has a very short range and does minor energy damage. In addition it has a small chance to hold your opponent for a brief moment.
Selecting an Archetype
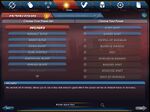
Your archetype is what many games call a "class"; it determines the nature of your powers, granting you access to specific primary and secondary power sets. Each archetype has its own unique powers, abilities, and pros and cons; choose wisely as this choice is permanent (but with a thousand character slots, you can always try something else later).
The "Playstyle" tab between Origin and Archetype simply changes the order in which the archetypes are presented. You can skip it altogether.
 Blaster
- The blaster is an offensive juggernaut. This hero can deal a ton of damage from a distance. But the blaster must be careful, because he's somewhat fragile compared to other heroes. The blaster can't stand toe to toe with most opponents at melee for long. His best defense is a great offense!
 Controller
- The controller is at the same time the weakest and yet the most powerful of the archetypes. The controller has few offensive attacks and possesses the fewest hit points. But the controller has access to a range of powers that no one else does. Armed with these powers, a controller can affect the behavior of villains, from freezing them in place, to putting them to sleep, to routing them away. Armed with such abilities, the controller is the backbone for any super group, but the controller depends upon his teammates for protection.
 Defender
- The defender tends to help his allies, and attack his foes, from a distance. The defender excels at powers that assist friends, but can also hinder his enemies. The defender is able to attack at quite a range, however, the defender is not built for hand to hand. He might be able to dodge a few attacks, but the defender won't last for long.
 Scrapper
- The scrapper is a fierce melee combatant. In hand to hand, no other hero can compare. But the scrapper is not as resilient as the tanker, and might find himself in a little trouble if he heedlessly wades into combat. The scrapper's aptitude for melee is countered by a total lack of distance attacks. Scrappers possess critical strike capability. Their melee attacks have a chance to sometimes do double damage.
 Tanker
- The tanker can take it and dish it out all at once. The tanker primarily can absorb vast amounts of damage, and hold his own in a fist fight. But the tanker lacks any long range punch. The tanker would prefer just to charge straight ahead anyway.
 Peacebringer (Epic)
- Peacebringers are formed from the fusion of an alien energy being called a Kheldian and a willing host. While peacebringers take more damage from most attacks, they make up for this weakness with solid hit points, a good variety of energy attack powers and strong defensive powers, inherent flight, and eventually even gain access to two shape-shift forms. Peacebringers become stronger when teamed with non-Kheldian heroes, gaining bonuses to their own powers based on the archetypes of their teammates.
 Warshade (Epic)
- Warshades are former Nictus who have left that dark path behind and reformed, joining with a willing host. While warshades take more damage from most attacks, they make up for this weakness with solid hit points, a good variety of dark energy attack powers and strong defensive powers, inherent teleport, and eventually even gain access to two shape-shift forms. Warshades become stronger when teamed with non-Kheldian heroes, gaining bonuses to their own powers based on the archetypes of their team mates.
 Brute
Brute- Brutes live to fight, and as a brute, you will revel in hand-to-hand combat. With strong offensive powers designed to inflict pain and impressive defenses to take it, you're the best there is in a straight melee fight. Protracted battles only make you mad, and the madder you get, the more damaging your attacks become. You do lack ranged attacks, which could leave you vulnerable to hit and run tactics without some allies to cover you.
 Corruptor
- Corruptors twist the forces of the universe to do their bidding. As a corruptor, you might strike your foes down with blasts of fire, entomb them in ice, infect them with radiation, or curse them with pure darkness. As your foes are weakened, your Scourge ability kicks in, increasing your damage to an enemy as their hit points drop. You can even impart a portion of your twisted power to your allies to protect them from harm, heal them, or increase the damage they deal. This wide array of abilities comes at a price. Your defenses aren't strong, and you can quickly attract the ire of your enemies if you aren't careful.
 Dominator
- As a dominator, you control a devastating combination of control and assault powers. A dominator can freeze foes in place, render them unconscious, or cause them to flee in terror. Dominators can also smite their foes with a selection of single-target melee and ranged attacks, albeit not with the same power as a corruptor. However, each time a dominator attacks, he comes closer to unleashing his true sadistic power of Domination. With so much emphasis on diverse offensive powers, dominators lack in defenses and work best with teammates who can provide protection.
 Mastermind
- As a mastermind, you excel at using others to do your dirty work. Perhaps you build killer robots, command deadly ninja, order hardened soldiers, or summon the undead to do your bidding. Whatever your choice, you have an army of minions at your beck and call. You can summon them when needed, order them to work your will, and even use your powers to enhance them or weaken your foe. The mastermind is a difficult class to play, often demanding constant attention to control your minions and stave off the retribution of your enemies.
 Stalker
- Skill can divert clumsy raw power, and precisely applied force can solve many problems. As a stalker, this is the core of your specialty. You do your best work when attacking from ambush, and can even hide in plain sight to escape foes. Deadly attacks and good defenses make you a dangerous combatant and assassin, but you can be overwhelmed if you're not careful.
 Arachnos Widow (Epic)
- Characters with Arachnos Widow training begin their careers as Blood Widows. Blood Widow characters begin with modest melee, ranges, and buff skills. Beginning at level 24, they may choose to switch to the "Fortunata" path or remain on the "Widow" path and become "Night Widows." Night Widows gain considerably stronger melee capabilities and only have modest ranged abilities, while those who go with the Fortunata path learn stronger ranged attack abilities and control abilities.
 Arachnos Soldier (Epic)
- Characters with Arachnos Soldier training begin their careers as Wolf Spiders. Wolf Spider characters have a strong mix of melee and ranged attacks and strong protective powers available via their power armor. Beginning at level 24, the player has to choose whether he will progress down the "Crab Spider" or "Bane Spider" path. Crab Spiders gain access to the "backpack" and the powerful claw/cone attacks is provides, while the Bane Spider track provides stealth and a stronger focus on melee.
Selecting Power Sets and Starting Powers
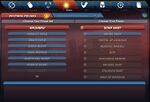
At this point, the real fun starts as you select a primary power set and your first power. After that, you choose a secondary power set and a second power, which complements your first power. The sets available to you will be determined by the archetype you selected; for example, all scrapper primary sets focus on melee damage, and all scrapper secondary sets focus on defences.
A power set is a group of nine related powers. You begin with the powers at the list's top and can gain additional powers as you progress through the game. Your level in the game determines which powers you have access to. The powers at the top of each list are, in general, more basic. You won't have access to the more exotic and complex powers until much later in your career.
The primary power set is the basis for all the powers you wield throughout the course of the game; this is the third most important choice you make when creating an alter ego. You will initially be able to select either of the first two powers.
Your secondary power set will support your primary powers, and you will be able to select either of the first two powers.
During power selection, you may wish to view details on each power's attributes in order to make a more informed decision. These details may be displayed at any time by clicking the Green "i" button in the top right of the power selection interface. You may return to the normal view again by clicking the "i" button again or the "x" in the top right of the details window.
Selecting a Gender and Build
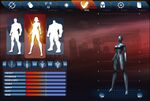
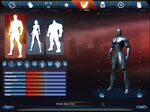
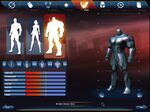
It's now time to choose the body type for your character's avatar. You may select a female, male, or huge body type from the radio buttons at the top of the Body Type Screen. (Note that you may create multiple costumes for your character later, and they can use all three body types.)
In addition, you can further customize your avatar's build by preselecting one of the default body types:
- Slim - Your avatar is svelte and has minimal body mass.
- Average - Your avatar is of average build.
- Athletic - Your avatar has good muscle definition. This is the default body style.
- Heavy - Your avatar is above average in weight and muscle.
You can then further tweak your avatar's build by adjusting the following sliders:
- Short/Tall - This will adjust how tall your avatar is. Moving the slider to the left will make you shorter. Moving to the right will make you taller. Unlike the other settings, this will be permanent and may not be altered in the interface at the tailor unless you have purchased Super Booster III: Superscience.
- Physique - This will adjust how muscular your avatar is. Moving this to the left will make your character have less muscle mass, and moving this to the right will give them more.
- Shoulders - This will adjust the width of the avatar's shoulders. Moving this to the left will make the shoulders narrower; moving this to the right will make them broader.
- Chest - This will adjust the circumference of the avatar's chest. Moving this to the left will make the chest smaller, and moving to the right will make the chest bigger.
- Waist - This will adjust the width of the avatar's waist. Moving this to the left will make it narrower, and moving to the right will make it wider.
- Hips - This will adjust your avatar's hip size. Moving this to the left will make your hips narrower, and moving to the right will make them wider.
- Legs - This will adjust the length of your avatar's legs without scaling the rest of the body in proportion. Moving this to the left will shorten the legs, and moving to the right will lengthen them.
Customizing Your Look
Creating a unique costume for your character is one of the most enjoyable tasks in character creation. Although there are literally millions of possible unique costume combinations, the costume design process is fun and easy if you just take it step by step.
In additon, most (but not all) power sets allow for some visual customization. In most cases, only the color of the visual effects produced by your powers can be modified. However, some powers may have alternate animations or visual effects to select from. Any time you select or alter the look of your costume, you will also have the ability to customize the look of your powers.
For more information on costumes, see the main article: Costumes
For more information on customizing the look of your powers, see the main article: Power Customization
Costume Editor
Character Display Window
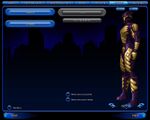
At the far right of the screen you will see your character displayed with the current options selected shown. As you alter your costume, the window will update to reflect your changes. The costume design screen allows you to rotate your figure at will by clicking on either of the curved arrows at the bottom of this window.
You can also zoom in on the upper body and head by clicking the plus sign between the arrows. Click again to zoom back out.
In order to view your costume against lighter or darker backgrounds, you can click on the brightness buttons to either side of the zoom button. Clicking the moon icon to the left will darken the background and clicking the sun icon on the right will lighten the background.
Costume Sets
At the top left of your screen, a "Costume Sets" menu has been provided to allow for quick, convenient selection of matching pieces in a particular costume set. You may click on the displayed costume set name and select from the pulldown menu that appears or you can click the arrows on either side to cycle through each costume set one by one. Selection from a costume set is entirely optional. After selecting a costume set, you may customize your costume as you see fit by modifying any colors or attributes you wish.
Skin Color
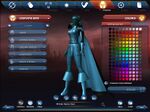
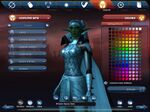
First, select your character's skin color. Click on the "Skin Color" bar in the middle of the screen. Now select a colored dot to adjust the color of your character's skin.
Costume Colors
Next, click on the bar below the skin color palette. If you want to coordinate your costume easily, you may use the "Copy Current Colors" button at the bottom of the color palette. This will make your entire costume conform to the two colors currently selected. Changing either of the two colors will cause the change to be made throughout the costume. If you want to color each piece of your outfit differently, make sure that the "Copy Current Colors" button is not selected.
Costume Pieces
Now, work from top to bottom on the left of the screen, start with the head. Here you can select from a wide variety of hairstyles, masks, helmets, glasses, and some more exotic options.
Next, move on to the upper body. You will be able to adjust your torso, shoulders, gloves, and belt here.
Last is the lower body. Here you can adjust the options for your legs and boots.
If you've chosen a weapons-based power set, you may also see an option to customize the appearance of your weapons.
Scales
Clicking on the "Scales" bar in the middle of the screen will bring up two sets of sliders.
The first set will be a series of sliders that will allow you to adjust your character's facial features. For each facial feature, the leftmost slider will adjust the width, the middle will adjust the height, and the furthest right will adjust the depth.
The following features may be fine-tuned:
- Head - The overall size of the head.
- Brow - The area above the eyes and below the hairline.
- Cheek - The area to the left and right of the nose and mouth, extending back to the ears.
- Chin - The area from below the mouth to the neck.
- Cranium - The area from above the brow and ears to the back of head.
- Jaw - The areas to the left and right of the chin, below the cheeks.
- Nose - The area between the eyes and above the mouth.
The second set of sliders is for the body and is identical to the sliders on the Body Type Selection Screen, but do not include the height adjustment bar.
Save and Load Buttons
In the upper right of the screen, you will see two buttons labeled "Save" and "Load".
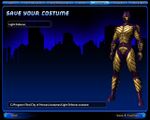
Clicking the "Save" button in the costume editor will change the screen to a prompt where you may enter a name you wish to give to your current look. At the bottom, you will see the full path and name of the costume options file that will be created. When you are done entering the name you wish to give your costume, clicking "Save & Continue" in the lower right of the screen will create the file and return you to the main costume creation screen. Clicking "Back" in the lower left will return you to the main costume creation screen without saving the costume options file.
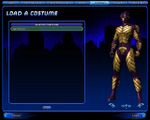
Clicking the "Load" button in the costume editor will change the screen to display a list of all costume files you currently have saved. Selecting a costume name in the "Existing Costumes" window will load the costume file for previewing to the right. When you have selected the costume file that you wish to load, click the "Load" button at the bottom right of the screen to overwrite the options you had previously selected in the costume editor with the ones in the file. If you find that none of your existing costumes is to your liking, you can cancel loading and return to the main costume editor screen without making any changes to your previous selections by selecting "Cancel" at the bottom left of the screen.
Should you wish to delete any existing costume options file, select the costume name while on the costume loading screen and click the "Delete" button at the bottom of the screen. You will then be prompted to confirm that you wish to permanently delete the currently selected costume. Clicking "Yes" will delete the costume file; clicking "No" will take you back to the costume loading screen.
Power Editor
Character Display Window
At the far right of the screen you will see your character displayed. When any animated power is selected, the character will be looping through the animated activation of the selected power with your current customization options shown. As you alter your selections, the animation of the power will update to reflect your changes. The power editor screen allows you to rotate your character at will by clicking on either of the curved arrows at the bottom of this window.
You can also zoom out on your character, allowing you to get a better view of powers with large area visual effects by clicking the minus sign between the arrows. Click again to zoom back in.
In order to view your powers against lighter or darker backgrounds, you can click on the brightness buttons to either side of the zoom button. Clicking the moon icon to the left will darken the background and clicking the sun icon on the right will lighten the background.
To get an on unobstructed view of your power effects without the editor menu in the way, you can click on "Hide Menus" near the bottom left of the power editor screen. Clicking this button a second time will restore the menus to the screen.
Power Set Palettes
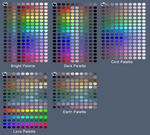
You can quickly set the palette of colors for all of your primary or secondary powers by setting the palette directly under the name of the set. The palettes available for selection will vary according to your selected power sets.
Power Customization
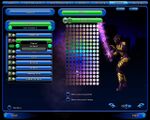
The color palette, visual appearance, and/or animation for each power within a set can be selected on a power-by-power basis. First, click on the power you wish to customize. Below the power you will be able to select from a list of possible visual effects and/or animation options. The options available for selection will vary according to the power you are customizing. Some powers will not allow for any customization and will appear grayed out in your list of powers.
Power Colors
After selecting the options for a power, if the colors of the power's visual effects can be customized, the available color palette will appear in the center of the power editor screen. The primary and secondary colors of your powers can be selected identically to how you selected the colors for your costume in the costume editor. In addition, you can set all of the powers in the same power set to the same colors by selecting "Match colors across power set" below the color palette. If possible, you can also set the colors of all powers in both your primary and secondary sets to the same values by selecting "Match colors across all powers" below the color palette.
Save and Load Buttons
In the upper right of the screen, you will see two buttons labeled "Save" and "Load".
Clicking the "Save" button in the power editor will change the screen to a prompt where you may enter a name you wish to give the current look of your powers. At the bottom, you will see the full path and name of the power options file that will be created. When you are done entering the name you wish to give your powers, clicking "Save & Continue" in the lower right of the screen will create the file and return you to the main power editor screen. Clicking "Back" in the lower left will return you to the main power editor screen without saving the power options file.
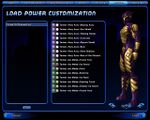
Clicking the "Load" button in the costume editor will change the screen to display a list of all power option files you currently have saved. Selecting a power option file name in the list on the left will load the power options in that file for preview in the center of the screen. Note that any options in the file that do not apply to the power sets you have selected will be grayed out and will not be loaded by the editor. When you have selected the power options file that you wish to load, click the "Load" button at the bottom right of the screen to overwrite the options you had previously selected in the power editor with the ones in the file. If you find that none of your existing power option files is to your liking, you can cancel loading and return to the main power editor screen without making any changes to your previous selections by selecting "Cancel" at the bottom left of the screen.
Should you wish to delete any existing power options file, select the file name while on the power option loading screen and click the "Delete" button at the bottom of the screen. You will then be prompted to confirm that you wish to permanently delete the currently selected file. Clicking "Yes" will delete the power options file; clicking "No" will take you back to the power loading screen.
Tailors
A character's identity is tied to their costume almost as much as their name. Any trainer can change your appearance, or there are special stores in the game where you can change both appearance and body dimensions and gender. For heroes, there are Icon tailor shops located in Steel Canyon, Independence Port, and Founders' Falls. Villains may visit the Facemaker shops in Cap au Diable or St. Martial. The Rikti War Zone and Tiki Room in Pocket D contain tailors that both heroes and villains can visit.
Adopting a Moniker
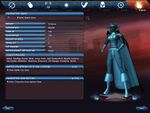
This is the last step in character generation. Before beginning play, you must select a suitable name for your hero or villain. On the same screen, you may also enter a brief description of your character and a battle cry.
When choosing a name for your character, you are limited to a maximum of 20 characters, including spaces.
When you are ready, click the button in the lower right corner of the screen to enter the game. If you are not a peacebringer, warshade, Arachnos widow, or Arachnos soldier, you will be asked if you want to do a tutorial. Selecting "Outbreak" makes you a hero and gives you an older tutorial. Selecting "Breakout" makes you a villain and gives you an older tutorial. Selecting "Galaxy City" gives you a newer (but less clear) tutorial in which you will choose your alignment; and if you skip the tutorial, you also will choose an alignment. (Or you may have picked "Going Rogue" above, in which case you begin in Praetoria.)
If you were successful, your character will be complete and you may now begin play.
If you chose a name that is already in use on your current server, you will have to change the name of your character and try again. Be patient as it may take several tries to find a name that is not already in use.
Character Description
Your "Character Description" can be edited at any time by opening the I.D. Screen and typing in the "Character Description" field. The editor is rather awkward and it may be easier to copy from any text document and paste to this window. You are limited to a maximum of 1023 characters (including spaces and carriage returns) in the "Character Description" field.
Battle Cry
Your character's "Battle Cry" may be edited at any time by opening your I.D. Screen and editing the "Battle Cry" field. You are limited to a total of 32 characters (including spaces) in this field. By default, when you press the F10 key on the keyboard, your character will shout out their battle cry and perform the "attack" emote.
What can't be changed later?
Your origin, archetype, and primary and secondary powerset cannot be changed after creation. Everything else can be.
